
How to Make Gummies at Home: Easy Homemade Gummy Recipe
9 min read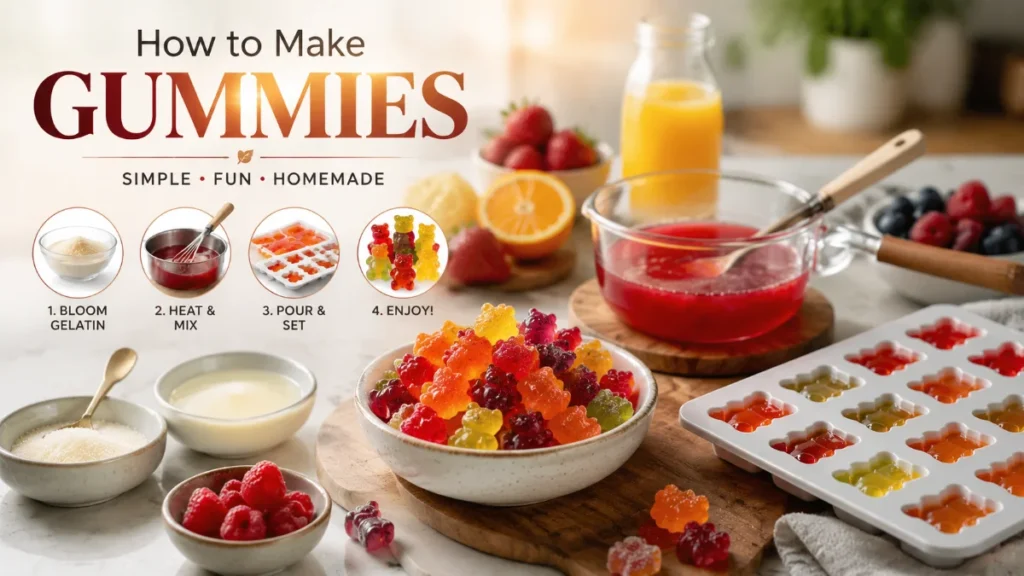
If you want to learn how to make gummies, the easiest place to start is with fruit juice and unflavored Gelatin. You do not need a candy thermometer or specialized candy-making equipment. The key is to bloom the gelatin properly, warm it gently without boiling, use enough gelatin for the amount of liquid, and give the finished gummies enough time to set.
This beginner method makes soft-to-chewy fruit gummies that work well in small silicone molds. Once you understand the basic formula, you can make gummy bears, fruit snacks, sour gummies, and different fruit flavors without changing the underlying technique.
The Basic Gummy Recipe at a Glance
For a dependable first batch, use this simple formula:
| Ingredient | Amount |
| Fruit juice | 1 cup (240 ml) |
| Unflavored powdered gelatin | 3 tablespoons |
| Honey or sugar | 1-2 tablespoons, optional |
| Lemon juice | ½-1 teaspoon, optional |
| Food coloring | Optional |
This produces approximately 30-60 small gummies, depending on the size of your mold.
The amount of gelatin is a starting point, not a universal rule. Gelatin strength varies between products, so the same measured quantity can produce somewhat different textures.
What You Need
The equipment is deliberately simple.
- Small saucepan
- Small bowl
- Spoon or whisk
- Silicone gummy molds
- Measuring spoons and cup
- Small measuring jug with a spout
- Baking sheet or tray
Put the silicone molds on the tray before filling them. Once they contain liquid, moving the molds becomes much harder.
How to Make Gummies Step by Step
1. Choose a good liquid base
Fruit juice is the easiest starting point because it supplies both liquid and flavor.
Apple, grape, cherry, cranberry, and berry juices are convenient choices. If the juice is already very sweet, you may not need additional sugar or honey.
For a smoother gummy, use strained juice rather than a thick smoothie containing a lot of pulp.
Fresh fruit purée can also work, but it changes the amount of water and solids in the recipe. If you switch from juice to purée, treat it as a modified recipe rather than assuming the same gelatin ratio will produce identical results.
2. Bloom the gelatin
Pour about ½ cup of the juice into a small bowl.
Sprinkle the gelatin evenly over the surface. Stir gently if needed, then leave it alone for about 5 minutes.
The gelatin should absorb the liquid and become swollen and thick. This is called blooming.
Blooming helps the gelatin hydrate before it is heated, making it easier to dissolve evenly.
3. Warm the remaining juice
Pour the other ½ cup of juice into the saucepan.
Warm it over low heat. Add the honey or sugar if you’re using it and stir until dissolved.
You are not trying to cook the juice. The goal is simply to create enough warmth to dissolve the hydrated gelatin.
4. Combine the gelatin and juice
Add the bloomed gelatin to the warm juice.
Stir gently until the mixture becomes completely smooth.
Avoid bringing the gelatin mixture to a hard boil. Gelatin is a protein-derived gelling ingredient, and excessive heating can weaken its setting performance. Gelatin is derived from collagen, which is why it behaves differently from plant-based gelling agents such as pectin and agar.
5. Adjust the flavor
Remove the saucepan from the heat.
Taste a small amount and decide whether it needs more sweetness or acidity. A little lemon juice can make fruit flavors brighter.
For sour gummies, use food-grade citric acid carefully rather than adding a large amount of lemon juice. Citric acid provides a more concentrated and predictable source of acidity.
6. Fill the molds
Transfer the mixture to a small measuring jug, squeeze bottle, or other container with a controlled pour.
Slowly fill each cavity.
If bubbles appear, allow the mixture to sit for a minute and remove visible foam. Pouring aggressively can introduce unnecessary air.
7. Refrigerate until firm
Place the filled molds in the refrigerator.
Small gummies can become firm in roughly 30-60 minutes, while larger shapes may need longer. The exact time depends on mold size, formulation, and refrigerator temperature.
Do not rely on a stopwatch alone. The gummies are ready when they hold their shape and feel springy rather than liquid or extremely soft.
Read Also: From homemade gummies to smart snack vending-see what’s next.
8. Unmold the gummies
Once fully set, gently flex the silicone mold.
Peel each gummy away from the cavity instead of pulling it aggressively.
If the gummies tear easily, return them to the refrigerator and let them firm up further.
How to Control the Texture
One of the best things about making gummies yourself is that you can adjust the bite.
| Desired result | General adjustment | Result |
| Softer gummy | Slightly less gelatin | More tender, jelly-like texture |
| Classic chewy gummy | Start around 3 tbsp gelatin per cup of liquid | Firm and springy |
| Firmer gummy | Increase gelatin cautiously | Denser, more resistant bite |
| Rubbery gummy | Too much gelatin | Reduce gelatin next time |
Do not make dramatic changes after one batch. Gelatin strength differs among products, so small adjustments are more useful than trying to find one universal ratio.
Why Some Gummies Do Not Set
If a batch fails, the problem is usually identifiable.
Too much liquid
A recipe containing more liquid than intended will produce a weaker gel.
This can happen when you add extra juice, fruit purée, water, or another liquid without adjusting the gelatin.
Gelatin was not fully hydrated
If dry gelatin forms clumps, some of it may never properly dissolve.
Blooming it first helps prevent this.
The mixture was overheated.
Gelatin should be dissolved gently, rather than boiled aggressively.
The fruit contains proteolytic enzymes.
This is particularly important with fresh pineapple and kiwi. Fresh pineapple contains bromelain, while fresh kiwi contains actinidin. These enzymes can break down proteins and interfere with gelatin gels. Illinois Extension specifically notes that fresh kiwi can make gelatin mixtures soupy because of actinidin.
Papaya also contains a proteolytic enzyme called papain.
Heat treatment can deactivate these enzymes, but the exact treatment depends on the fruit and preparation. Do not assume that every fruit needs to be cooked before use.
How to Make Gummy Bears Without a Special Recipe
Gummy bears are made from the same basic mixture.
The mold changes the shape, not the fundamental gelling process.
For very small bear molds:
- Use a squeeze bottle or dropper.
- Fill each cavity carefully.
- Avoid overfilling.
- Work over a tray to catch spills.
- Chill the filled molds before attempting to unmold them.
The smaller the cavity, the faster it generally cools and sets.
How to Make Gummies Without a Mold
A silicone mold is convenient, but it is not essential.
Pour the prepared mixture into a shallow parchment-lined dish. Refrigerate until firm, then cut it into squares or strips.
You can also use a small silicone baking mold or food-safe ice-cube tray.
This approach is particularly useful if you’re making fruit snacks rather than decorative gummy bears.
How to Make Gummies With Real Fruit
Real fruit gives you more control over flavor but also makes the formulation less predictable.
Juice vs. purée
Juice is easier for beginners because its water content is relatively straightforward to measure.
Purée contains fruit solids and sometimes fiber, pulp, or seeds. Those components can affect texture and make the mixture thicker.
If using purée, strain it when a smooth gummy is desired.
What about pineapple and kiwi?
Fresh pineapple and kiwi can interfere with gelatin because of their proteolytic enzymes. If you want those flavors, a heat-treated juice or appropriately cooked fruit is a safer starting point for a gelatin recipe.
Do not automatically apply this warning to every gelling agent. The issue is especially relevant to gelatin because gelatin itself is a protein.
How to Make Sour Gummies
Once you know how to make gummies, sour versions are easy to create.
Start with a mildly sweet fruit base. Add a small amount of food-grade citric acid to the gummy mixture, or apply an acid-sugar coating after the gummies have set.
A simple coating can contain:
- Granulated sugar
- A small amount of food-grade citric acid
Coat only after the gummy surface is sufficiently dry. If the surface is wet, the sugar and acid mixture can dissolve.
Add the acid gradually. Too much can overpower the fruit flavor and make the coating unpleasantly sharp.
Gelatin vs. Pectin vs. Agar-Agar
If you need a vegetarian or vegan gummy, gelatin is not appropriate because it is animal-derived.
| Gelling agent | Main characteristic | Best use |
| Gelatin | Elastic, springy chew | Classic gummy bears |
| Agar-agar | Firm, less elastic gel | Plant-based firm gummies |
| Pectin | Fruit-oriented gel; formulation varies | Fruit-forward or vegan gummies |
Agar and pectin should not simply replace gelatin in equal amounts.
Pectin is especially formulation-dependent. High-methoxyl pectin commonly relies on sugar and acid, while low-methoxyl pectin can use calcium to form a gel. Extension guidance specifically recommends following the instructions for the particular pectin product because different pectins behave differently. (Iowa State University Extension.
If your goal is simply to make your first successful batch, gelatin is the easiest starting point.
How to Store Homemade Gummies
A simple juice-and-gelatin gummy should not automatically be treated like commercial candy.
Commercial confectionery can use controlled sugar concentration, drying, packaging, and other processing methods that affect moisture and stability.
For this home recipe:
- Let the gummies set completely.
- Place them in a clean airtight container.
- Refrigerate them.
- Keep them protected from excess moisture.
- Discard gummies showing mold, unusual odor, or other signs of spoilage.
Do not assume that adding more sugar, citric acid, or cornstarch makes a homemade gummy shelf-stable.
Food safety depends on formulation and available moisture, among other factors. FDA explains that water activity is a measure of the water available to support microbial growth and is an important factor in food safety.
Troubleshooting Homemade Gummies
| Problem | Likely cause | What to do |
| Too soft | Too much liquid or insufficient gel strength | Increase gelatin slightly next batch |
| Too rubbery | Too much gelatin | Reduce gelatin |
| Won’t set | Incorrect formulation, overheating, or enzyme-active fruit | Check ingredients and preparation |
| Sticky | Excess surface moisture or humidity | Chill thoroughly and control storage humidity |
| Cloudy | Foam or trapped air | Stir gently and skim the surface |
| Tears when unmolding | Not fully set | Chill longer |
| Sour coating becomes wet | Surface still moist | Allow the surface to dry before coating |
Troubleshooting works best when you change one variable at a time. Otherwise, you will not know which adjustment solved the problem.
Read more: Learn How to Make Gummies at Home……
A Simple Scaling Rule
Once the basic recipe works, you can scale it.
| Juice | Starting gelatin amount |
| ½ cup | 1½ tbsp |
| 1 cup | 3 tbsp |
| 1½ cups | 4½ tbsp |
| 2 cups | 6 tbsp |
This is a proportional starting point, not a guarantee that every gelatin brand will produce identical results.
For a new gelatin product, make a small batch first.
Frequently Asked Questions
How to make gummies with just a few ingredients?
The simplest approach is fruit juice, unflavored gelatin, and optional sugar or honey. Bloom the gelatin, warm the remaining juice, combine the ingredients gently, fill molds, and refrigerate until firm.
Do I need a candy thermometer?
No. A basic gelatin gummy only requires gentle warming to dissolve the gelatin. A thermometer becomes more useful for concentrated sugar syrup or commercial-style gummy formulations.
Why are my gummies too soft?
Usually the liquid-to-gelatin balance is too low in gelling strength, the gelatin was not fully dissolved, or the gummies have not chilled long enough. Fresh enzyme-active fruit can also interfere with gelatin.
Can I use Jell-O instead of unflavored gelatin?
Yes, but it changes the formulation because flavored gelatin contains flavoring, sweetener, color, and other ingredients. It is better to use a recipe designed around it rather than treating it as identical to plain gelatin.
Can I make gummies without gelatin?
Yes. Agar-agar and pectin can produce plant-based gummies, but they require their own formulations and preparation methods.
Can I make gummies without a mold?
Yes. Set the mixture in a shallow dish and cut it into pieces after it firms up.
Can I use fresh pineapple in gummies?
Fresh pineapple can interfere with gelatin because bromelain breaks down proteins. A heat-treated pineapple product is a better starting point for gelatin gummies.
How long do homemade gummies last?
There is no universal shelf-life period for every homemade formulation. A simple juice-and-gelatin gummy should be refrigerated and treated as a homemade perishable food rather than assumed to be shelf-stable.
Why are my gummies sticking together?
Surface moisture, humidity, or a softer formulation can cause sticking. Let them set completely and store them in a clean container without compressing them together while they are still moist.
How can I make gummies firmer?
Increase the gelatin gradually in your next batch while keeping the liquid amount consistent. If the gummies become rubbery, reduce the gelatin slightly.
Final Takeaway
Learning how to make gummies does not require complicated equipment. A reliable beginner method is built around fruit juice, unflavored gelatin, gentle heating, accurate proportions, and enough chilling time.
Start with 1 cup of juice and about 3 tablespoons of gelatin, then adjust the texture gradually based on your gelatin product and preferred bite. Once you’ve mastered the basic method, you can move into real-fruit gummies, sour coatings, gummy bears, vegan formulations, or commercial-style candy.
The most useful rule is simple: change one variable at a time. That turns gummy making from guesswork into a repeatable kitchen skill.